
Applying Tissue for a Seamless Finish
Written by Tom HallmanMy modeling life changed for the better when I was introduced to blue UHU glue stick and Krylon spray, found in office supply or department stores. A longtime user of dope or white glue on the frame, I found a number of hidden bonuses with the glue stick approach.
First, it is not necessary to pre-coat the frame with dope or white glue before applying the glue stick. Just sand the frame smooth, and apply a light coat of the UHU evenly. For those interested in wing loading, this saves a few grams. It may also be the reason that my tissue has never lost it's hold in damp weather, since the glue is directly on the balsa, and not on a thin coating of dope.
Secondly, the glue stick is odorless, so gone are the days of saturating the house with the smell of dope. Also, there is no rush with using the glue stick. Once it's on the frame, you can walk away and come back hours or even days later if you need to. The glue is easily reactivated through the tissue with isopropyl rubbing alcohol.
I apply the tissue in the standard way, tugging softly as I move down the fuselage for example, floating on some alcohol through the tissue with a small brush. The alcohol is tissue friendly, and doesn't break apart the fibers as quickly as water would if you were using white glue. Still, you need to be gentle. The glue stick allows you to lift and reposition the tissue as often as you'd like, so again the pace is less hectic. For me this is very important, because I like to think of the covering process as a relaxing experience, and not one of 'spinning plates' as on the old Ed Sullivan Show.
When overlapping the tissue on a frame, I float some alcohol on the seam and softly rub it in with my finger. This appears to melt the seam together, creating a soft and nearly invisible overlap.
Some have suggested additionally sealing the overlaps with dope, etc. for fear of coming unglued in damp weather, but I haven't found this to be a concern in the 12 years of using the UHU glue stick.
Generally I pre-shrink and pre-color my tissue on a frame, using acrylic enamels and an air-brush. I also try to apply any markings or numbers with an air-brush before I attach the tissue to the model. This makes for a lighter and cleaner appearance. However, occasionally markings are attached with colored tissue and a glue stick, again using alcohol to reactivate and seal.
Finally, after the tissue is shrunk on the model's frame with alcohol or water, I 'dust' the model with either Krylon matte or crystal clear (gloss). This seals the tissue and more importantly has proven to prevent it's continual shrinkage, which often turns our beautiful, perfectly trimmed models into pretzels.
I've had models 8-10 years old that are the same today as they were
when first completed. It's magic in a can, adding very little weight
to the model.
Tom Hallman
Post Script: I usually try to add some opacity to the tissue, even if it's yellow tissue, as on the Cessna C-38. I feel it helps keep the look consistent when you cover not only the frame but also sheet balsa.
That look where the sheeted areas are far brighter or a different texture etc than the framed areas always makes the model look odd. So again, spraying the tissue yellow in this case, with a bit of white added to the yellow, seems to make the surfaces closer together in color.
But it's a fine line of course. You can go overboard with the spray, and suddenly it's looking and weighing like a dope job over silk instead of tissue. I like to come in somewhere between Pres Bruning and Chris Parent.
Dave Rees is my mentor, so I often look to his approach, although
Dave goes a few steps closer to the lighter ships than I care to.
Tom, August, 2006
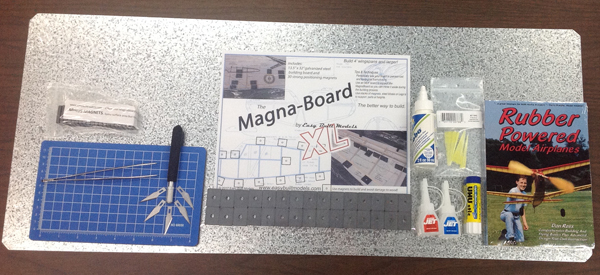
Building Set for Rubber Power
Includes a hobby knife, 5 blades, straight point tweezers, 5.5" x 9" Self Healing Cutting Mat, Jet Instant glue, Jet Super glue, Jet Tips, glue stick, canopy glue/tacky glue, MagnaBoard XL™ set, Minus Magnets 20 pack, and Rubber Powered Model Airplanes book. Save 25% off individually priced items! There is a limit of 2 sets per order.
item B329 Price: $79.95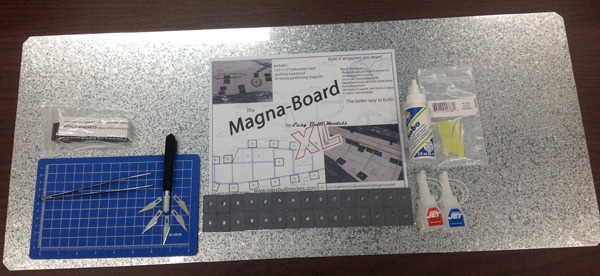
Building Set
Excludes the book on rubber power and the glue stick. Includes a hobby knife, 5 blades, straight point tweezers, 5.5" x 9" Self Healing Cutting Mat, Jet Instant glue, Jet Super glue, Jet Tips, canopy glue/tacky glue, MagnaBoard XL™ set, and Minus Magnets 20 pack. Save 25% off individually priced items! There is a limit of 2 sets per order.
item B332 Price: $66.95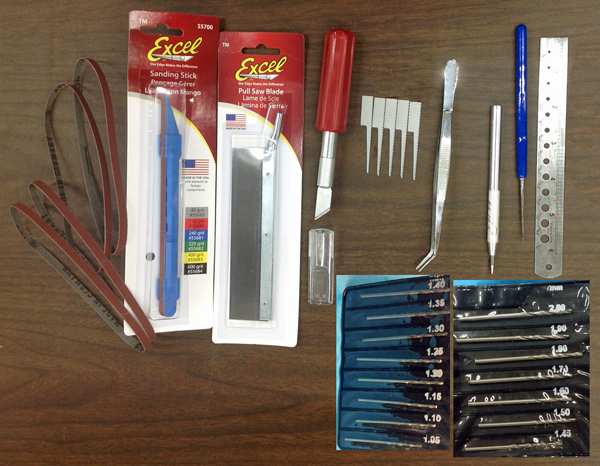
Advanced Tool Set
Includes Sanding Stick with 120, 240, 320, 400, and 600 grit belts, Pull Saw Blade, K5 Heavy Duty Knife with beveled blade, Narrow Keyhole Saw Blades 5 pack, Curved Tip Tweezers, 1/16" Ball Tip Burnisher, Jewelers Needle Point Awl, Steel Ruler 6" x 1" with drill gauge, 15 piece drill set (1.05mm - 2mm). Save 30% off individually priced items!
item B330 Price: $45.99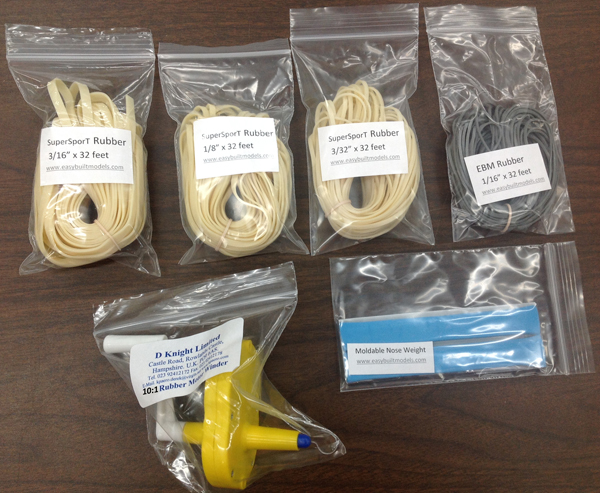
Flight Pack for Rubber Power
Includes a 10:1 winder, moldable nose weight, FAI SuperSport rubber 32 feet each 3/32", 1/8", and 3/16" and 32 feet EBM 1/16" rubber. Save 23% off individually priced items!
item B331 Price: $34.95